
Custom Storage (Under $350)
An Ikea glow up for my guest bedroom - supplies and a step-by-step guide to build your own custom cabinet.

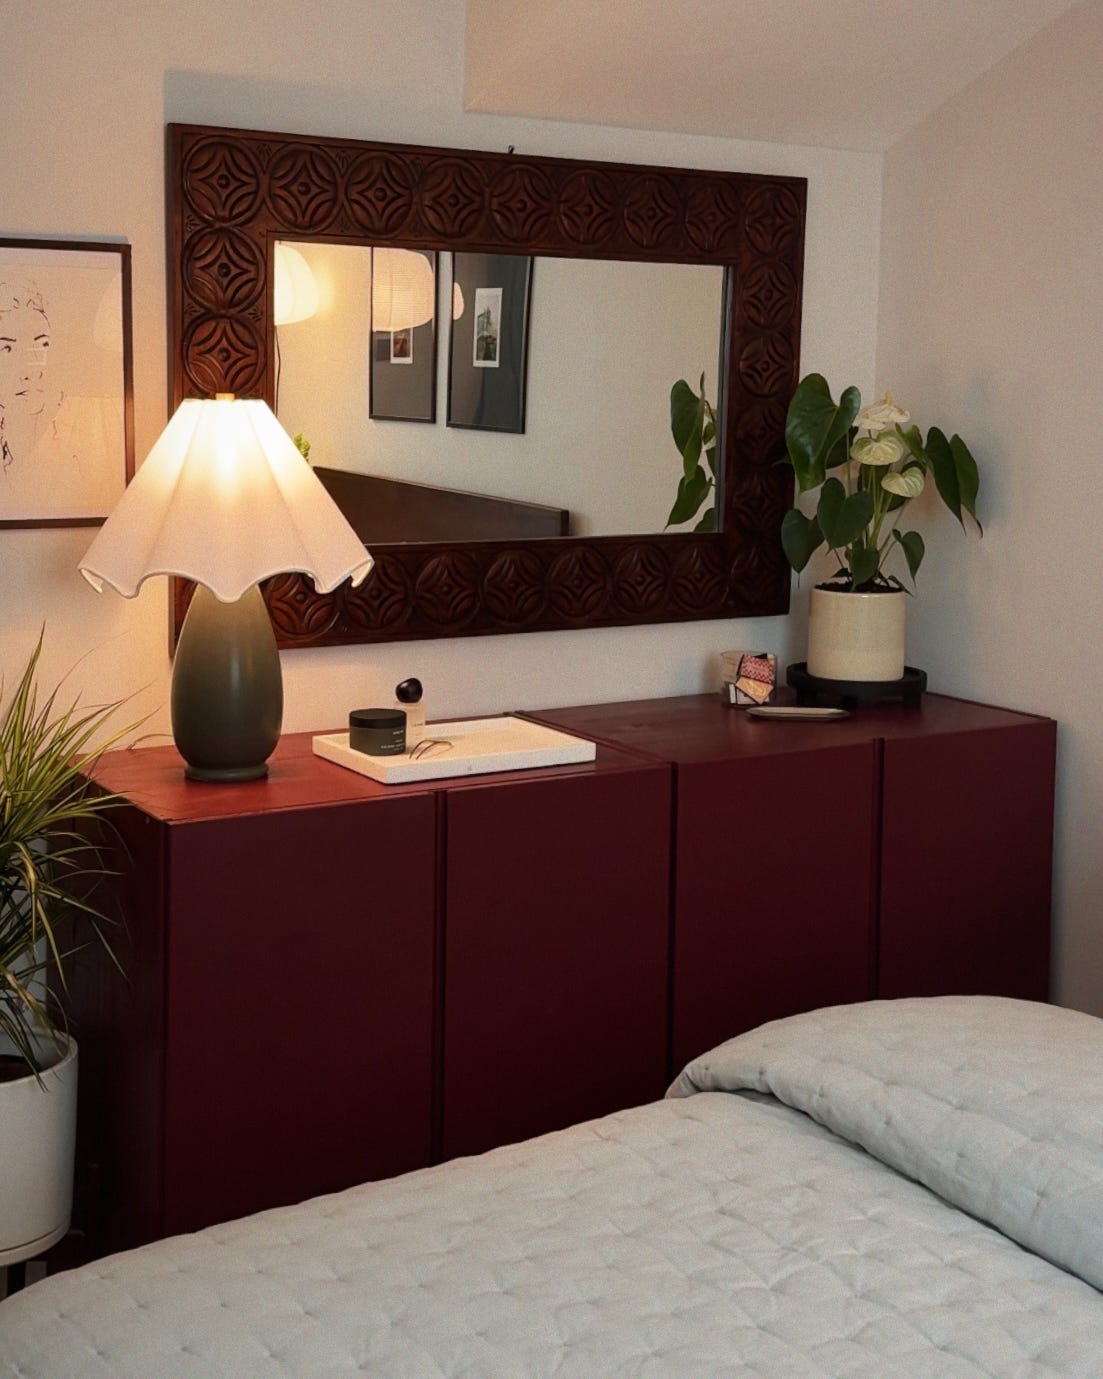
One of my goals for this guest bedroom makeover was to have dedicated storage for my hosting essentials (think serving plates, extra napkins, candlestick, etc.) and miscellaneous craft items. They had taken over our basement closet (ya know, the place for clothes) and I needed a better solution.
Based on the size and shape of the items I wanted to store, I knew a cabinet with doors and deep shelves would be more functional than a typical dresser with shallow drawers.
I also wanted this piece to bring a large dose of color into the room. Since we are renting and not able to paint the walls, adding color through furniture felt like the best alternative. To keep the project budget-friendly while still giving myself complete freedom over the color, I knew a DIY approach was the way to go.
Enter the Ikea Ivar cabinet: a solid pine piece with a large online presence in the DIY space. It’s available in two sizes, and I opted for the larger 20-inch deep version so it could accommodate oversized serving trays, platters, and bowls. The smaller size would look amazing in a living room, entry way, or dining area.
The best thing about the Ivar is its simplicity. It’s truly a blank canvas that can be customized in countless ways, from paint and hardware to trim and decorative details. I highly recommend browsing Pinterest for inspo before getting started!
Here’s how I customized mine:
Supply List:
2 Ikea Ivar cabinets (31”x20”x33”)
2 8’ Pine board (cuts below)
1 Quart Behr ‘Half Sea Fog’ paint (interior)
1 Quart Behr ‘Twinberry’ paint (exterior)
Kreg Pocket-Hole Jig (includes pocket hole screws)
6” paint roller, foam rollers, and paint tray (kit here)
Paint
I highly recommend assembling at least one cabinet before you start painting and using it to mark which faces and edges will be the interior versus exterior color. Doing this made the painting process much easier because I wasn’t constantly stopping to figure out which side of each panel needed which color.
You can also paint the entire cabinet after assembly, but I found it much easier to lay each panel flat and paint them individually.
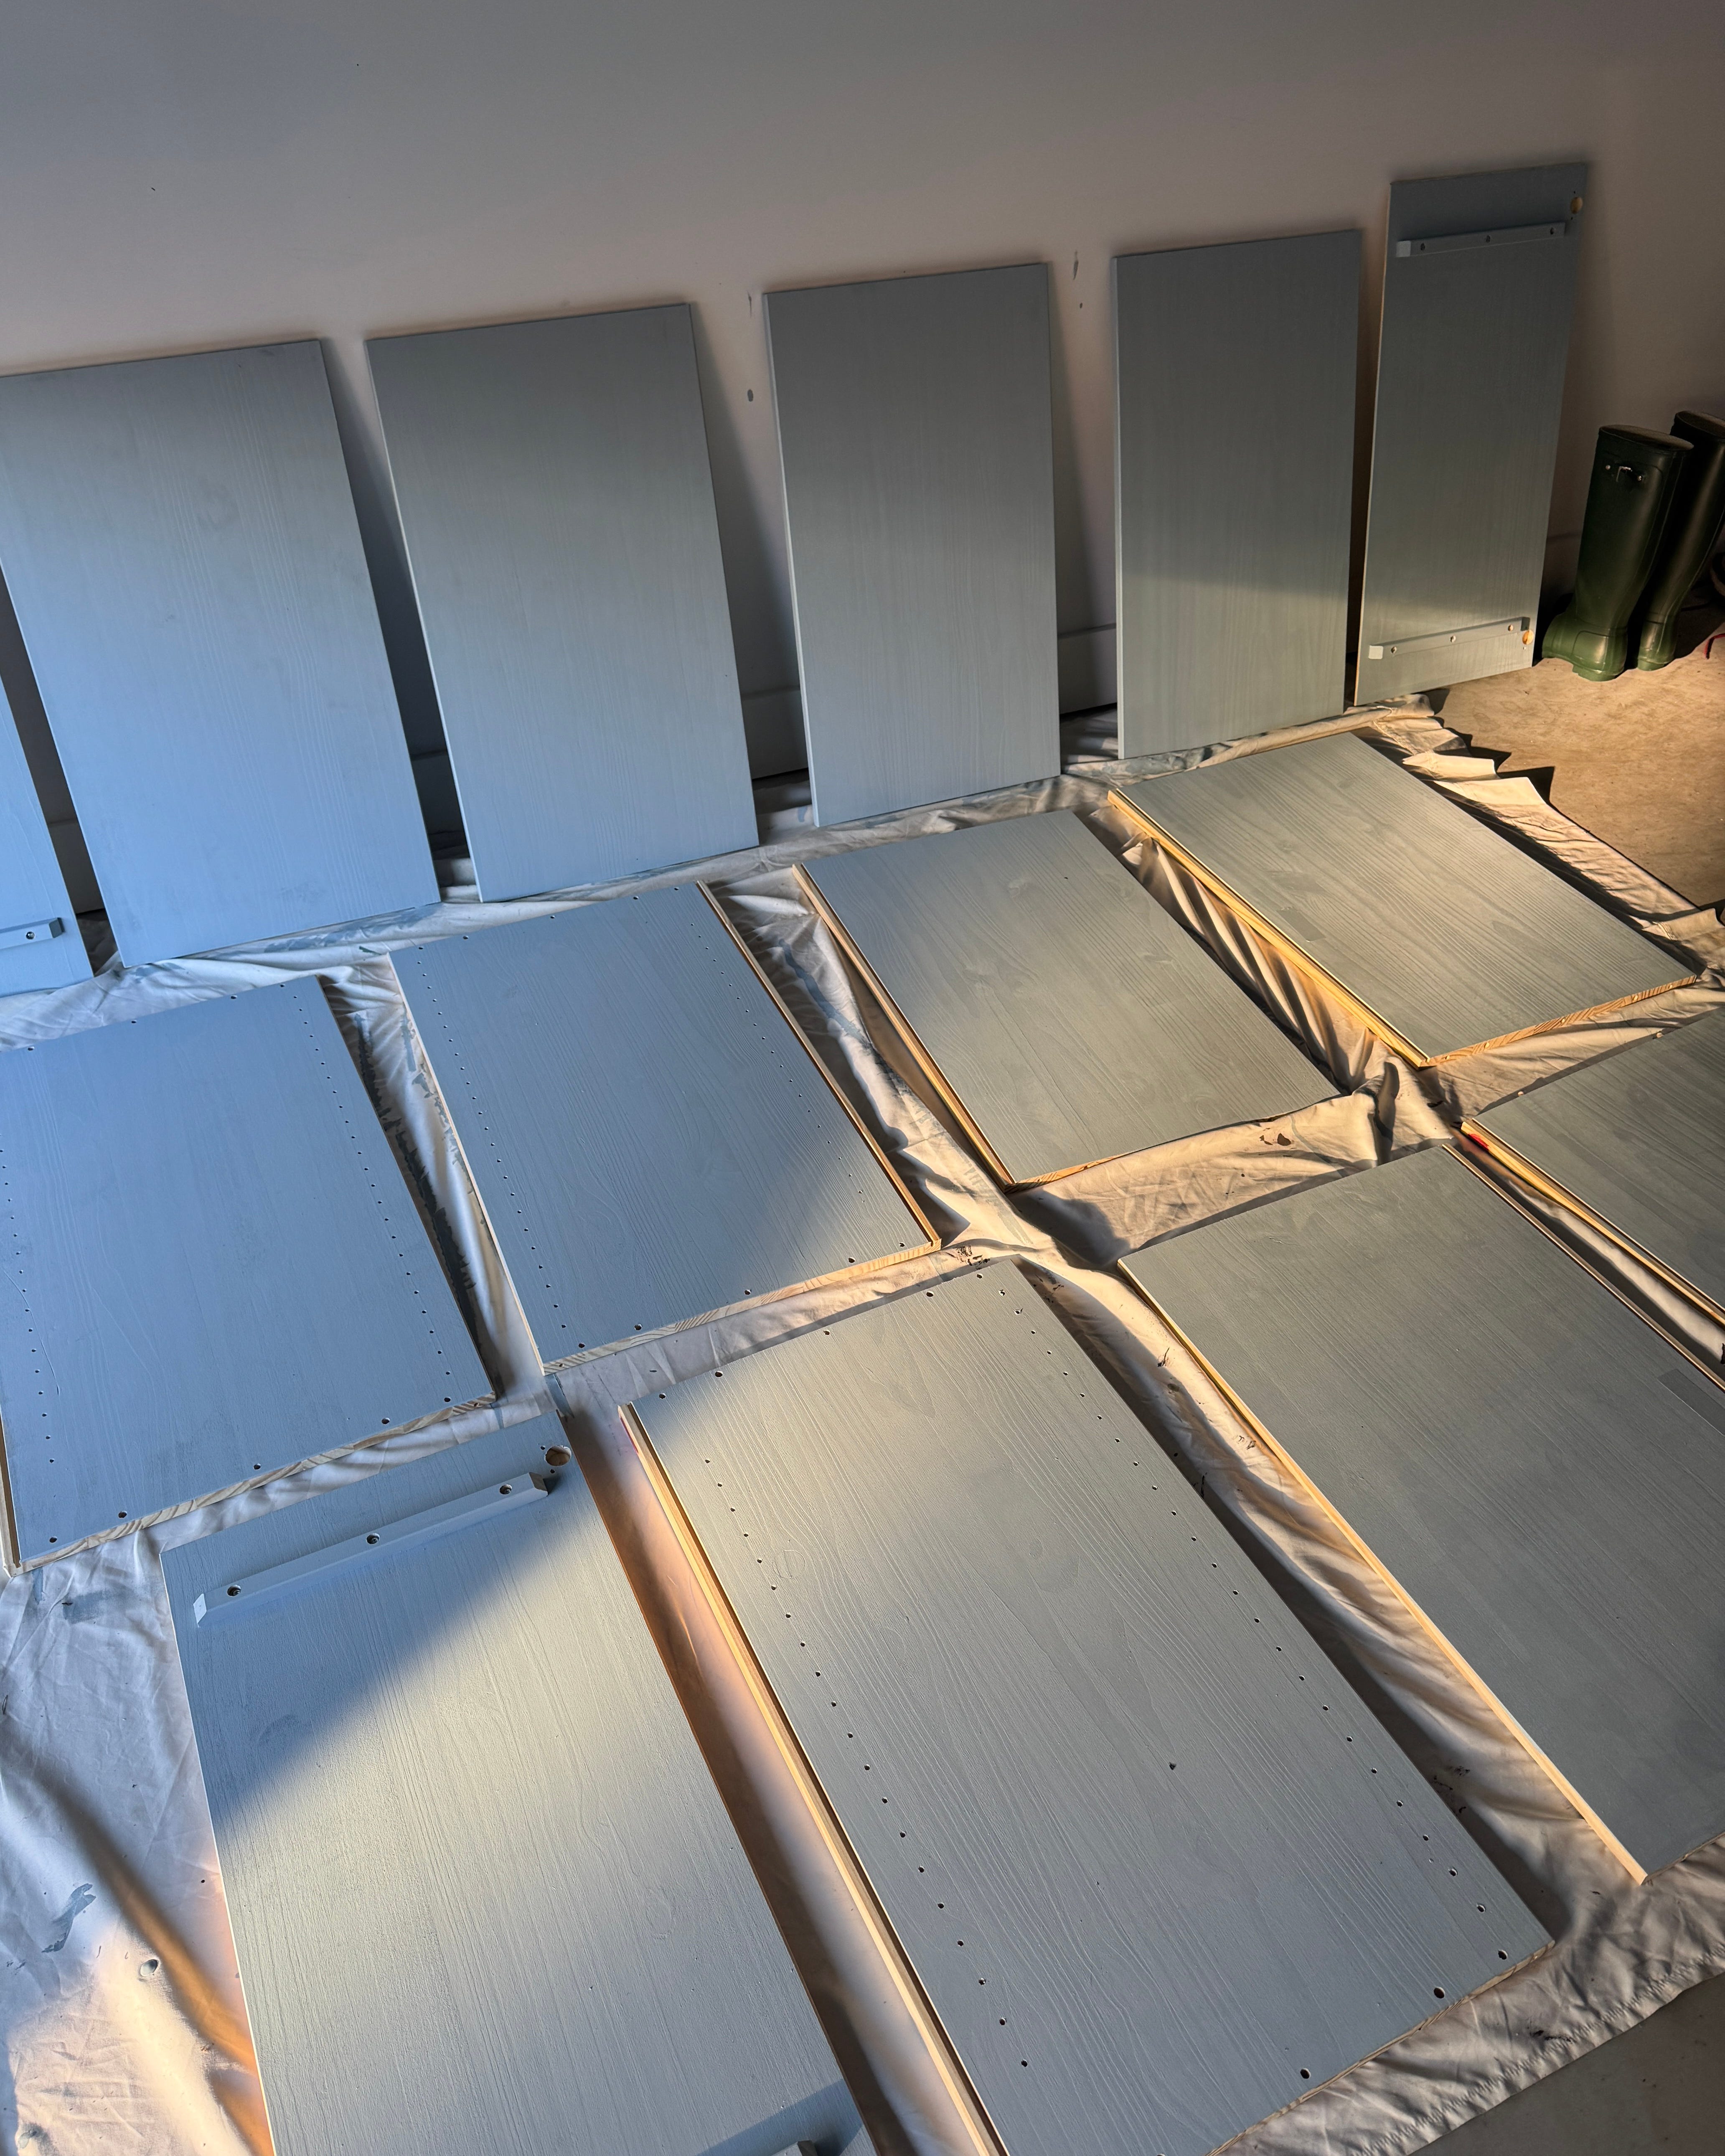
I started by painting all of the interior pieces first so that any mistakes could be covered up later with the exterior color. Ikea’s unfinished pine furniture is designed to be painted (unlike their glossy particleboard pieces), so sanding and priming aren’t strictly necessary. That said, if you’re aiming for an ultra-smooth finish, both are recommended since paint can slightly raise the wood grain. Personally, I didn’t want to spend the extra time on prep work (this is a guest bedroom, after all) so I skipped both steps and am still very happy with the results.
The paint pro at Home Depot recommended using a foam roller to minimize brush marks and streaking, and I found that one quart of each color was just enough for two coats of paint. Confession, I bought a gallon of ‘Twinberry’ and hardly made a dent. Who knew paint was so expensive - save yourself the mistake and the money!
Cabinet Base
I am not a carpenter by any means, but my husbands has recently been diving into the hobby (lucky me). Building these bases took less than 10 minutes, and the Kreg pocket -hole jig I mentioned above makes the process incredibly beginner friendly.
And yes, Home Depot will make the cuts for you!
Pine 2x2 cut list:
4 pieces at 27.5”
4 pieces at 14.75”
Using your pocket-hole jig and clamp, drill two pocket holes into each of the four shorter pieces.
Next, use the pocket-hole screws included with your jig to assemble the pieces into a simple rectangular frame.
Once assembled, paint the bases to match your cabinets and allow them to dry completely before placing the cabinets on top.
For simplicity, I chose not to attache the bases to the cabinets. They are heavy enough that they sit securely on top without shifting or risk of tipping.
Creative Ideas
I ran out of time on this one and just wanted to have the cabinets ready for visitors so I passed on any extras, but if I had more time (and more budget) I think these additions would be pretty cool:
Add a custom cut marble or quartz top
Install hardware to suit your design style (I love these chrome pulls)
Glue on wooden half circles for an impressive dimensional look
Apply trim
Find my full guest bedroom makeover on Instagram! x, Melissa